Wednesday, July 4, 2012

Door To Table To Art

Our latest DIY project for the apartment is finally finished!  It took a long time, and a lot of scattered afternoons to get it done, but it was well worth the time and effort.  We now have a door transformed to both a table and a piece of artwork.

You see, last winter an 1850s era carriage house collapsed next to our old apartment building.  It was owned by our landlord and we were given the go a head to salvage a few things if we would like (obviously done after the city had demolished the building so it was safe to be around).  We had always loved the look of old doors and thought this would be a great opportunity to salvage one...so we did.  Here is the door before a lick of work was done.


Okay, that is slightly misguided...we'd already removed the old hardware, which was a long project on its own due to the insane amount of rust.

For almost a year the door lived on the back porch of our old apartment building until we moved to our new place and had to decide whether or not to bring it along.  You see, it is a rather giant, heavy, solid door.  After doing some thinking, we decided it would make a nice table that we could set up whenever we needed it but not have to keep up at all times (we don't usually have reasons to sit at a table that seats 6-8 people). 

Once the nice weather finally hit, we were able to get started.  We started by doing a lot of reading about refinishing old painted surfaces, since there is always a chance that the paint may contain traces of lead.  So, no worries, we took the necessary precautions while doing the work.

First we sanded the door.  We didn't bother to get all of the paint off, there were quite a few various layers, but we got most of it off so it would not flake.
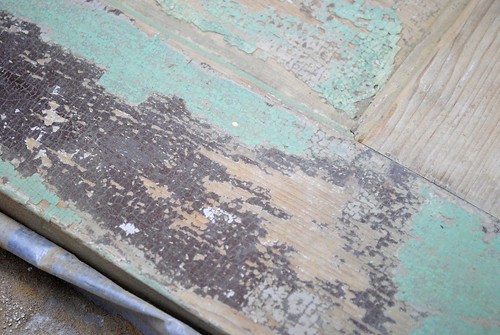

We left more paint on the side that would be the "art" side and less on the "table" side.
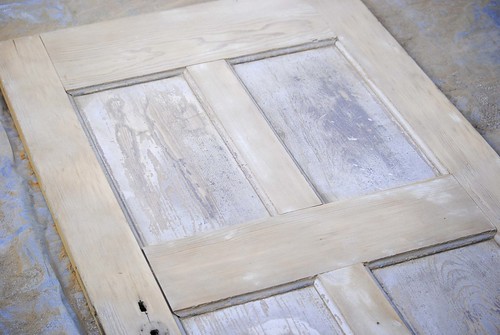

After all of the sanding, it was time to coat it.  We decided on a clear polyurethane coating so the natural color of the wood would shine through, rather than using a stain/polyurethane combination.  We carefully wiped down the door of all leftover sanding dust and loose paint chips and then started coating it.  This process took an excessive amount of time as it kept raining, causing us to do one coat on one side and then bringing the door in after drying, rather than putting on the second coat (we did two coats on each side). 

The next major piece of the table puzzle was to secure a piece of acrylic to the table surface in order to create a nice and smooth surface for eating.  We did some careful reading about cutting down, drilling starter holes, and screwing into acrylic as we definitely did not want to crack it.  We learned that you should go slow and spritz the drill bit or screw with cold water to keep the heat of the work from melting the acrylic.

When we finally finished, we sat it on top of its saw horse legs (that we had previously attached some grippers to so the top wouldn't slide around), and this is how she looked.
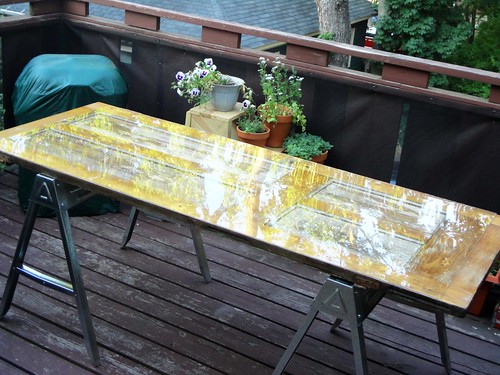

It is a little difficult to see the actual door under the acrylic as the sun was in just the wrong spot.  Ah well, you get the idea (we'll post another picture on a less glaring day).  Here's a picture of the "art" side of the door.
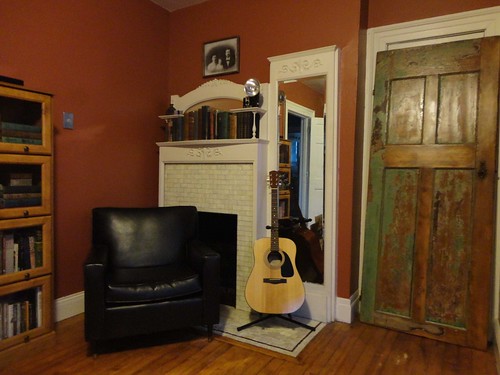

It is leaning up against one of the closets in the office.  The closet holds the folding chairs for the table and the saw horse legs...so the door doesn't block anything that we typically need access to, which is nice!


Have you finished a long project lately?  Taken anything from one thing to something entirely different? 

Wednesday, June 27, 2012

A Little Bit of Gardening

Well, summer is off to a great start!  I spent over a week visiting family in Illinois, which means I can finally show you some of the birthday presents I made for my niece...but more on that later.  I wanted to share this quick post about my spring/early summer gardening adventure.  I took some of these pictures a while back and thought it was about time I post them.

It all started back in March when I was inspired by this post at Young House Love.  I thought, hmmm...maybe I should try starting our herbs from seeds this year.  So, I went out and picked up an indoor greenhouse and a few different herbs that we tend to use on a regular basis.  It was sort of nice to see a little bit of spring start to sprout in our very cold Connecticut apartment.

By May they were ready to be re-planted outside...


We had the starts of Rosemary, Parsley, Basil, Oregano, Lavender, and Cilantro for our little herb garden...plus Catnip to draw our curious baby cats away from the other herbs!  We planted them each in their own little pot, and also picked up a few flowers to plant.  Now, this being my first independent container-gardening adventure, I encountered a few bumps along the way.  Well, actually one major bump, but it was entirely fixable.

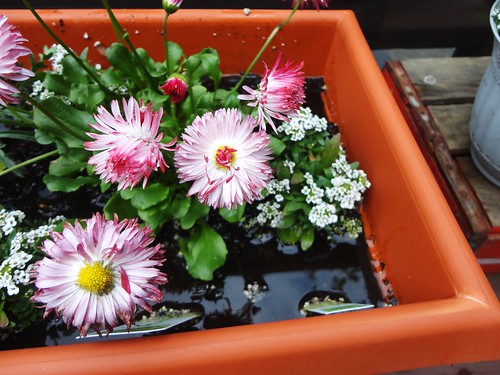
After a few weeks of spring rains, I realized that the large pot of flowers was looking like this...


Not good!  Obviously I had a bit of a drainage problem.  So, I went about on a rescue mission to save my drowning flowers.  After buying some much needed supplies, including rocks for the bottom of the planter, I was ready to tackle the water problem.  With a trusty turkey baster (that later went through the dish washer twice...just to make sure), I was able to siphon off most of the standing water, retrieve my drowning plants, and start all over again.  Now, don't worry, I didn't just throw the sopping wet soil aside, I just redistributed it over some already existing flowerbeds in the yard where it could slowly dry out.

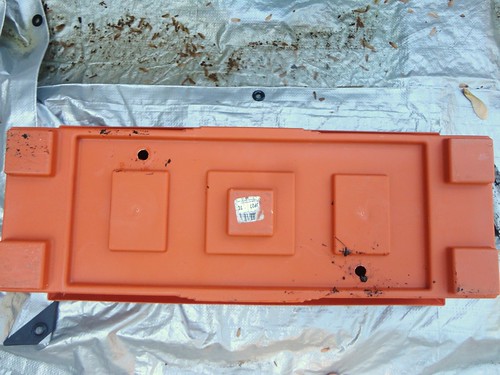
As I was checking everything out to see what all was contributing to the problem (aka...was I just a bad beginning gardener, or was the pot also working against me), I turned the planter over and found this...


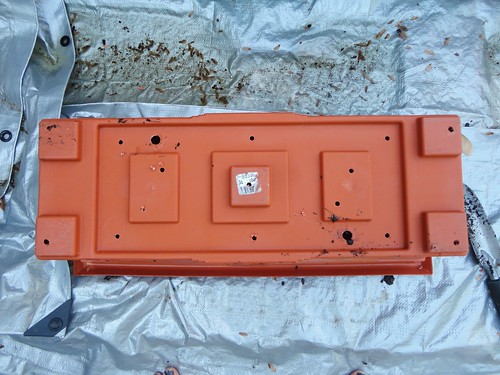
That's right, a large planter with two...count them two drainage holes!  Luckily this was easy to fix and after about 2 minutes with my handy drill I had this...


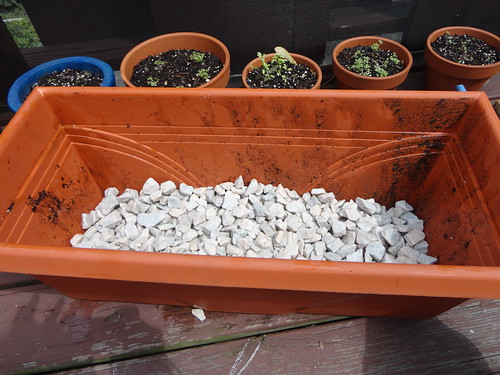
A large planter with 17 drainage holes.  Much better.  I proceeded to fill the bottom of the planter with rocks and replant my flowers.


You can see the freshly planted herbs in the background.  I did end up losing a few of my small white edge flowers.  I think they had been too far gone when I discovered the problem and didn't survive the transplanting.  However, most things made it and I think they are looking pretty good right about now.

Here is a view of the deck container garden as of a few days ago.


 The flowers are all blooming and the herbs are doing great!  And yes, the catnip is at the bottom of the stairs so the baby cats can get to it easily.  Everything started off just sitting in a clump on this side of the deck (it gets the most sun), but we wanted to change it up a little.  We went hunting and found the crate and the stairs hanging around the apartment unused, so Jess decided this would be a perfect use for them.  And judging from this picture, not only was she right, but also it might be about time to make some pesto!


Have you done any container gardening?  Did you have instant success or end up on a learning curve like me?  Or just re-purpose anything from around the house lately? 


Monday, May 21, 2012

A Great Week

Well, I think I have finally recovered from last week's Brimfield excursion.  We've managed to get our Brimfield trips down pretty well...we know which vendors have stuff we like, where the prices are good, and who is willing to haggle.  We've also figured out how to see everything we want to see and get in and out in under 6 hours!  Granted, when we decide to make the trek without a trusty list in hand and predetermine to just wander around and look for what inspires us, well....those trips are a bit longer...

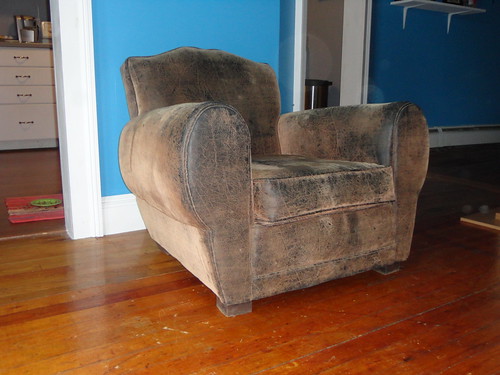
This, was not one of those trips.  We managed to get very lucky and found the most desired and largest item on our list (a club-style chair for the living room) towards the beginning of the day, which meant we knew exactly how much room was left in the car for bringing home other treasures.  It is always fun to see people stop and watch us as we carefully maneuver our treasures into our Pontiac Vibe...it isn't a large vehicle, but as we are fond of saying "it may be small, but we know exactly how big it is."  Here is what we brought home...


And yes, our beautiful cat Annie thinks that we bought it just for her sleeping enjoyment!  Ah well, whatever keeps her happy...as long as she shares.

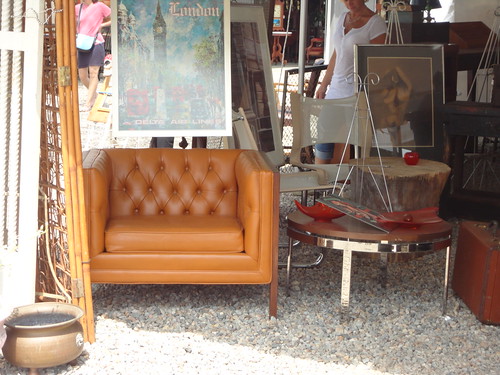
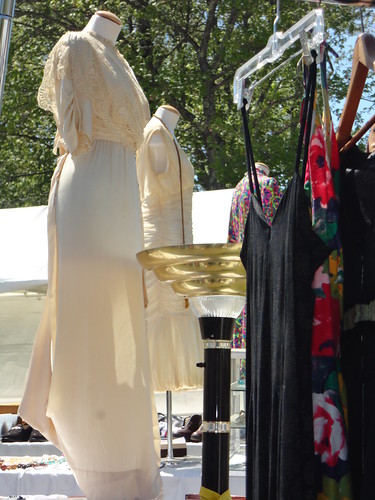
Here is a glimpse of some items that did not make it home with us, but were sufficiently drooled over...


Our circa 1912 bride just barely didn't come home with us.  We found her at the end of the day and by then had already spent our budget for the event..and I was trying to be good.  So instead, I just snapped this quick picture and will look for her again in July.  Doubtful she'll still be there, but you never know at Brimfield.

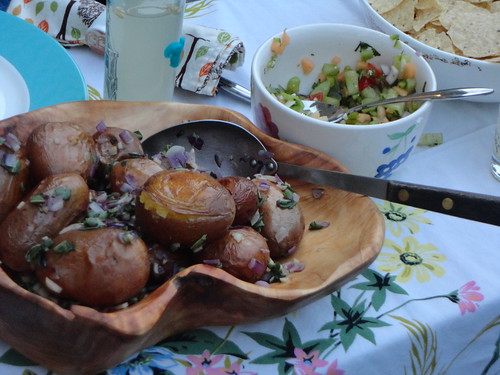
After our weekend trip, we had a nice week of good weather and managed to enjoy some of it with a friend of ours.  It was our first real dinner guest at our new place.  We made veggie kabobs with homemade bbq sauce, grilled pineapple, fresh tomatillo salsa, and potatoes with onions and sage...and awesome vegan apple cinnamon cupcakes for dessert!  We didn't have our table project finished yet (which you will all get to see eventually) so we ate out on the back deck and used the deck box as a table.  Of course it was dressed up with some vintage linens from my Aunt and our awesome serving dishes.


Yay for friends and a good week.  Here's hoping this coming week is just as great.


Have you found any treasures lately?  Had to pass something up because you were "being good?"  Or just had a friend over to enjoy a nice Spring evening?


Wednesday, May 9, 2012

Going to Brimfield???

We are!!!  If you've been following my blog for the past year, you will have already noticed that I LOVE Brimfield week.  Well, weeks actually.  We try and go to all three Brimfield weeks because they are just that awesome.  I thought that instead of just writing my usual look-at-the-cool-things-I-found-at-Brimfield post after the fact, that I would write a short post before the weekend with a few tips that I've learned from our Brimfield excursions. 


Here are my top tips (in no particular order) for any Brimfield adventurer:

* Dress/pack for ANY weather condition...even if it is 90 degrees and sunny, do NOT leave home without a rain jacket in the back of the car...similarly, even if it's raining, don't forget the sunscreen...the weather can change in an instant and it is easier to walk back to the car than to be miserable for the next 6 hours.

* On a similar note, wear appropriate shoes...even if it rained on Tuesday and you are going on Sunday, chances are the ground is still mucky and wet from Tuesday and all of the foot traffic, combined with the severe lack of grass by the end of the week will make for uneven ground...also wear shoes that you will actually want to walk in for hours on end.

* Take a backpack/messenger bag...there are many, Many, MANY small items at Brimfield and if you don't have a place to put your treasures as you begin to collect them you will find yourself either needing to constantly run back to the car, or playing a delicate balancing act in your arms for the rest of your visit (which makes it that much harder to go digging through and finding even more treasures).

* Take Cash!  Although some of the merchants are set up to take credit cards, and some will take personal checks, your best bet is to pay with cash...there are ATMs on the grounds, but better to be safe than sorry...it also makes it much easier to stick to a budget and only spend the cash you have...(note, be mindful any time you are carrying large amounts of cash, we have never had a problem at Brimfield but we always take precautions like splitting the cash between us and also keeping some in various places...all of it in the backpack + backpack left at lunch table = big problem!)

* Make a list if you can...this is an entirely personal choice, but I find that Brimfield can be extremely overwhelming if you are only going for one day and plan to look at everything...we like to make a list of the major pieces we are looking for so we have our sights set on something...this does not mean that we don't look at everything, but sometimes it can help us decide if a tent is even worth going into...on our first trip to Brimfield we were completely unprepaired and by the end of it I felt like crawling into the fetal position because of the extreme amount of inspiration and things to see.


This year our Brimfield adventure will likely consist of:

--dressing in layers: hiking pants (cool if it's hot, and dry quickly in the rain), t-shirt layered over a tank top, long sleeve shirt or sweatshirt, hat to keep off the sun, and tennis shoes, plus an extra pair of socks and a rain jacket in the car just in case
--backpack containing: sunglasses, bottle of water, hand sanitizer and small travel roll of toilet paper (there are port-a-potties, but there are also thousands of people...things run out), and small reusable shopping bag just in case
--The List: chairs (for reading), old camera/surveyor's tripod, and always on the list are textiles/costumes/sewing supplies (me) and Maxfield Parrish prints/anything Stickley inspired (Jess)

Well folks, those are my words of wisdom.  I hope you decide to venture out to Brimfield this week (May 8th-13th)...and if you end up there on Sunday you just might see me!!!!

Happy Hunting!!


Do you obsessively make lists?  Do you find them helpful at antique shows/flea markets?  Or are you the dive-in-and-see-what-happens type?