Some craft projects are thought about long and hard and executed after hours of hard work and creative problem-solving. Others are created out of an immediate need. This is one of those projects.
I came home the other day and it was particularly stuffy in the apartment. You see, we have only one window in the living room and this gorgeous double door out to the deck. However, the door doesn't have a screen, so if you want to open the door to let in a breeze but don't want to let in the bugs, it is nearly impossible. And thus instant craft time ensued.
Have you ever seen those insta screen doors? Like this one. Well, it gave me an idea...so I gathered supplies and got to work.
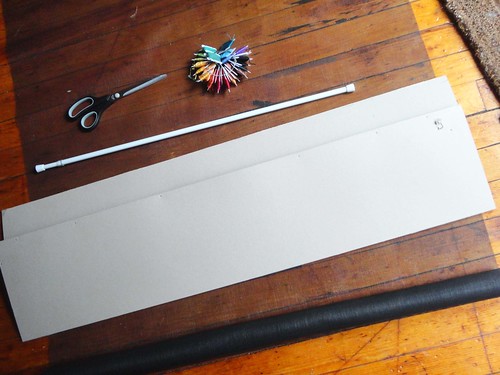
I actually ended up not using the cardboard, but forgot to retake the picture. It was a pretty simple project with a pretty simple idea. Plus it was the best kind of project because it used things I already had around the house, including some leftover nylon screening.
* Cut screening the length of the door plus about six inches.
* Fold over the top 3" to create a casing, and stitch. I decided to use some fun embroidery floss to add some interest.
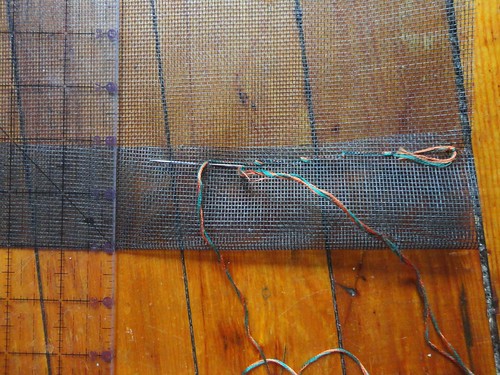
* Slide the tension rod through the casing and adjust to fit at the top of the door.
You can also create a casing at the bottom of the screen and slide in some cardboard, weights, or anything you can think of to weigh the bottom down. I left enough extra at the bottom to do just this, but I was desperate for some cool air and decided to add that feature later.
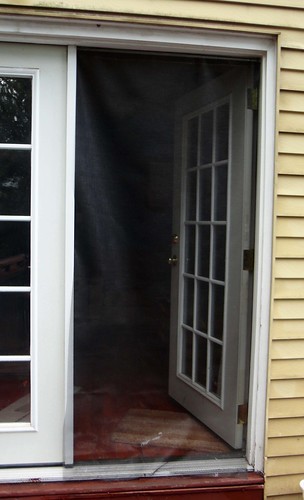
Somehow I got lucky enough that the screening we had was the exact width of the doorway. Not sure how that happened, but I sure am glad it did! If your screen is too wide, just trim it down a bit before you start. You want to make sure it will fit from side to side with a bit of extra to close any gaps. Now, this does not work for keeping cats in or out (it took Annie about 2 minutes to figure out if she headed to the corner she could just push it back). However, that might change depending on what we use to weigh it down. But it did significantly cut down on the house flies and flying insects that came into the house.
So, yay for instant crafts, a cooler house, and a project using nothing but found supplies!!!
Have you done any instant crafts lately? Become so desperate you just have to finish a project right now? Or just any home improvements? Or, in our case, removable apartment improvements?
Showing posts with label DIY. Show all posts
Tuesday, August 14, 2012
Monday, July 16, 2012
The Story of a Tank Dress
My sister Emily posted a link on my Facebook to a blog she thought I would like...well, as usual, she was right. Not only did I immediately fall in love with, and make, the tutorial she linked to, but I spent a good portion of tonight reading all the way to the beginning! What was this wonderful blog and tutorial my sister sent me, you may ask? Sweet Verbena, right here on Blogger. Katy has some great tutorials, plus an adorable puppy that I sort of covet...he looks like Josephine, only a dog :-)
The tutorial Emily sent me was for Katy's tank-top turned dress, you can find it here. Now, I forewarn, this is not a tutorial, it is simply a few pictures showing you how it went when I followed Katy's tutorial. If you want the real thing, click on over to Sweet Verbena.
Here is the fabric, and the tank top I used. They made for a nice combination.
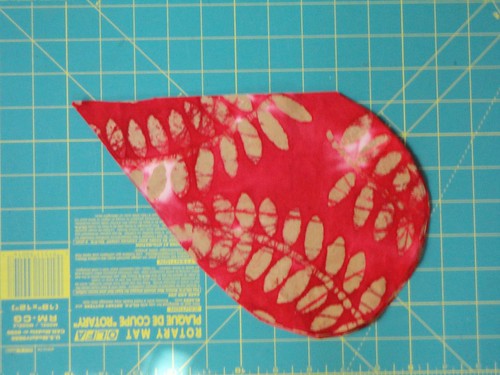
I followed along carefully and cut my tank top, sewed the elastic to the bottom, cut the fabric, and cut out the pockets...see...
It's a little blurry, but you get the idea. I was surprised at how easy doing the pockets were. I don't know why I always assumed pockets would be difficult, they aren't...at all.
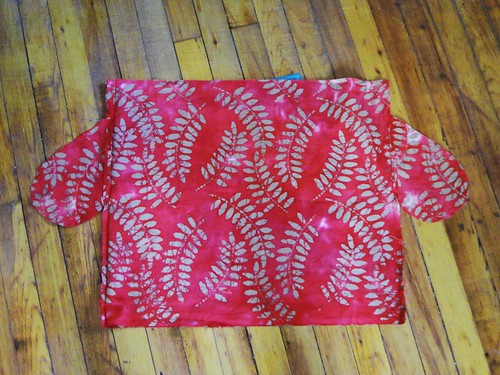
Next, it was time to sew the skirt portion together. It looked a little funny lying on the floor...
But it turned out just how it was supposed to! Next I gathered it at the top and stitched it to the tank top. I had Jessica try it on before I ironed it, it was sort of funny because the freshly gathered skirt before ironing made it REALLY poofy at the seam and it gave Jessica a very odd shape. Luckily, after some ironing it looked pretty good. Here's Jessica's finished tank dress.
I think I just may have to make one for myself! As with all tutorials, I learned something about my own materials and how you sometimes have to adjust what you are doing based on slight differences. For instance, since ribbed tank tops have much more built in stretch, I should have made the elastic piece around the bottom a little larger to make it even easier to get on and off. Oh well, at least it still fit!
Have you discovered a new blog lately? Saw something you just had to create right then? Or just shared some inspiration with family?
The tutorial Emily sent me was for Katy's tank-top turned dress, you can find it here. Now, I forewarn, this is not a tutorial, it is simply a few pictures showing you how it went when I followed Katy's tutorial. If you want the real thing, click on over to Sweet Verbena.
Here is the fabric, and the tank top I used. They made for a nice combination.
I followed along carefully and cut my tank top, sewed the elastic to the bottom, cut the fabric, and cut out the pockets...see...
It's a little blurry, but you get the idea. I was surprised at how easy doing the pockets were. I don't know why I always assumed pockets would be difficult, they aren't...at all.
Next, it was time to sew the skirt portion together. It looked a little funny lying on the floor...
But it turned out just how it was supposed to! Next I gathered it at the top and stitched it to the tank top. I had Jessica try it on before I ironed it, it was sort of funny because the freshly gathered skirt before ironing made it REALLY poofy at the seam and it gave Jessica a very odd shape. Luckily, after some ironing it looked pretty good. Here's Jessica's finished tank dress.
I think I just may have to make one for myself! As with all tutorials, I learned something about my own materials and how you sometimes have to adjust what you are doing based on slight differences. For instance, since ribbed tank tops have much more built in stretch, I should have made the elastic piece around the bottom a little larger to make it even easier to get on and off. Oh well, at least it still fit!
Have you discovered a new blog lately? Saw something you just had to create right then? Or just shared some inspiration with family?
Wednesday, July 4, 2012
Door To Table To Art
Our latest DIY project for the apartment is finally finished! It took a long time, and a lot of scattered afternoons to get it done, but it was well worth the time and effort. We now have a door transformed to both a table and a piece of artwork.
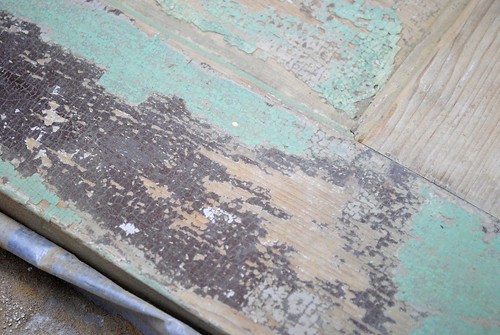
You see, last winter an 1850s era carriage house collapsed next to our old apartment building. It was owned by our landlord and we were given the go a head to salvage a few things if we would like (obviously done after the city had demolished the building so it was safe to be around). We had always loved the look of old doors and thought this would be a great opportunity to salvage one...so we did. Here is the door before a lick of work was done.
Okay, that is slightly misguided...we'd already removed the old hardware, which was a long project on its own due to the insane amount of rust.
For almost a year the door lived on the back porch of our old apartment building until we moved to our new place and had to decide whether or not to bring it along. You see, it is a rather giant, heavy, solid door. After doing some thinking, we decided it would make a nice table that we could set up whenever we needed it but not have to keep up at all times (we don't usually have reasons to sit at a table that seats 6-8 people).
Once the nice weather finally hit, we were able to get started. We started by doing a lot of reading about refinishing old painted surfaces, since there is always a chance that the paint may contain traces of lead. So, no worries, we took the necessary precautions while doing the work.
First we sanded the door. We didn't bother to get all of the paint off, there were quite a few various layers, but we got most of it off so it would not flake.
We left more paint on the side that would be the "art" side and less on the "table" side.
After all of the sanding, it was time to coat it. We decided on a clear polyurethane coating so the natural color of the wood would shine through, rather than using a stain/polyurethane combination. We carefully wiped down the door of all leftover sanding dust and loose paint chips and then started coating it. This process took an excessive amount of time as it kept raining, causing us to do one coat on one side and then bringing the door in after drying, rather than putting on the second coat (we did two coats on each side).
The next major piece of the table puzzle was to secure a piece of acrylic to the table surface in order to create a nice and smooth surface for eating. We did some careful reading about cutting down, drilling starter holes, and screwing into acrylic as we definitely did not want to crack it. We learned that you should go slow and spritz the drill bit or screw with cold water to keep the heat of the work from melting the acrylic.
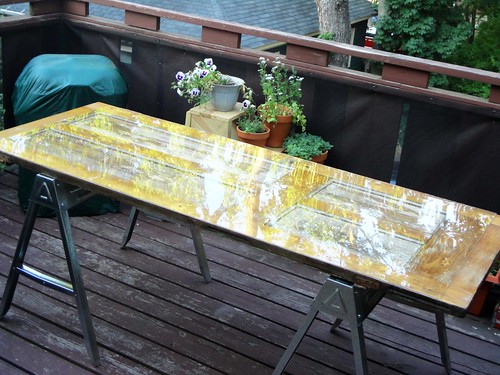
When we finally finished, we sat it on top of its saw horse legs (that we had previously attached some grippers to so the top wouldn't slide around), and this is how she looked.
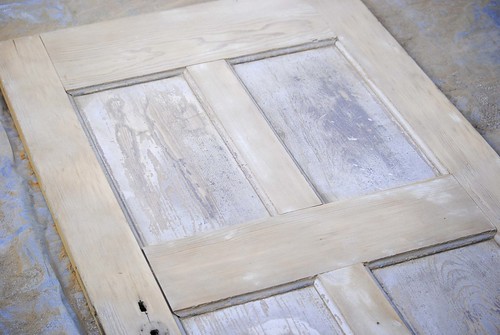
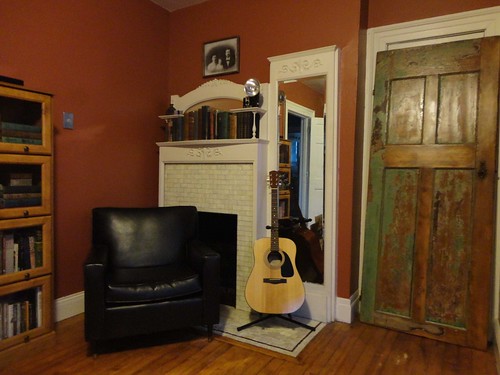
It is a little difficult to see the actual door under the acrylic as the sun was in just the wrong spot. Ah well, you get the idea (we'll post another picture on a less glaring day). Here's a picture of the "art" side of the door.
It is leaning up against one of the closets in the office. The closet holds the folding chairs for the table and the saw horse legs...so the door doesn't block anything that we typically need access to, which is nice!
Have you finished a long project lately? Taken anything from one thing to something entirely different?
You see, last winter an 1850s era carriage house collapsed next to our old apartment building. It was owned by our landlord and we were given the go a head to salvage a few things if we would like (obviously done after the city had demolished the building so it was safe to be around). We had always loved the look of old doors and thought this would be a great opportunity to salvage one...so we did. Here is the door before a lick of work was done.
Okay, that is slightly misguided...we'd already removed the old hardware, which was a long project on its own due to the insane amount of rust.
For almost a year the door lived on the back porch of our old apartment building until we moved to our new place and had to decide whether or not to bring it along. You see, it is a rather giant, heavy, solid door. After doing some thinking, we decided it would make a nice table that we could set up whenever we needed it but not have to keep up at all times (we don't usually have reasons to sit at a table that seats 6-8 people).
Once the nice weather finally hit, we were able to get started. We started by doing a lot of reading about refinishing old painted surfaces, since there is always a chance that the paint may contain traces of lead. So, no worries, we took the necessary precautions while doing the work.
First we sanded the door. We didn't bother to get all of the paint off, there were quite a few various layers, but we got most of it off so it would not flake.
We left more paint on the side that would be the "art" side and less on the "table" side.
After all of the sanding, it was time to coat it. We decided on a clear polyurethane coating so the natural color of the wood would shine through, rather than using a stain/polyurethane combination. We carefully wiped down the door of all leftover sanding dust and loose paint chips and then started coating it. This process took an excessive amount of time as it kept raining, causing us to do one coat on one side and then bringing the door in after drying, rather than putting on the second coat (we did two coats on each side).
The next major piece of the table puzzle was to secure a piece of acrylic to the table surface in order to create a nice and smooth surface for eating. We did some careful reading about cutting down, drilling starter holes, and screwing into acrylic as we definitely did not want to crack it. We learned that you should go slow and spritz the drill bit or screw with cold water to keep the heat of the work from melting the acrylic.
When we finally finished, we sat it on top of its saw horse legs (that we had previously attached some grippers to so the top wouldn't slide around), and this is how she looked.
It is a little difficult to see the actual door under the acrylic as the sun was in just the wrong spot. Ah well, you get the idea (we'll post another picture on a less glaring day). Here's a picture of the "art" side of the door.
It is leaning up against one of the closets in the office. The closet holds the folding chairs for the table and the saw horse legs...so the door doesn't block anything that we typically need access to, which is nice!
Tuesday, April 17, 2012
Before and After: Stereo Cabinet
Moving into our new apartment has been stressful, exciting, and a challenge. One of the first challenges we faced was what to do with the television. Our new living room is about the size and shape of our old living room (narrow and rectangular) but our old set-up just was not going to work. At our previous apartment, the TV sat on a short bookcase with a large bookcase on either side, which was great since that was the only available place to keep all our books. However, now that our books are kept in an entirely separate room, we could do something a little less imposing for the TV.
We decided that something light and airy would be perfect, and settled on a mid-century credenza-style TV stand. After realizing that a credenza might be a bit long for the wall, we decided to keep an open mind, but stick to that sort of look. Of course, we did not want to just go out and buy something, because we pride ourselves on a nice mix of aesthetics in our apartment: antique, contemporary, refurbished, bold, neutral, etc. So, after carefully measuring our space, we went on the hunt. I think we each trolled Craigslist about five times a day, plus stopped in every antique store and resale shop we came across over the last month. Finally we found something! Below is a brief history of how we made our new TV stand...
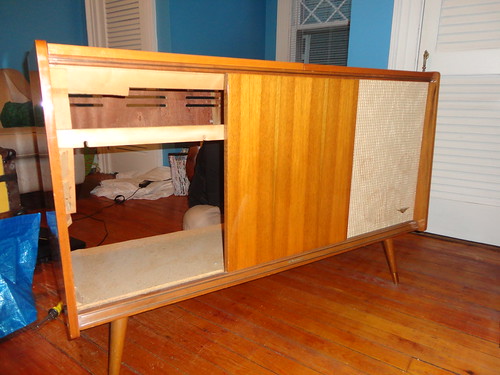
After relentless searching, we finally found this gem on Craigslist last week for.....$50!!!! I'd say that's a pretty perfect price!
Now, don't get confused. After we picked it up and got it home I thought "hmmm...I'll put in dinner and then we can start working on this while it cooks." Silly Me! I forgot how we work in our household...something comes in and it INSTANTLY gets started! By the time I put dinner in the oven, Jess had already taken one of the speaker fronts off...so this is only a sort-of before picture.
As you may have realized with the mention of speaker fronts, this is not a credenza but a mid-century stereo cabinet. The previous owner had already removed all the internal workings for the stereo, but that just made our job less difficult and much less guilt ridden! (For the longest time we were finding "working" stereo cabinets online but just couldn't muster the resolve to rip out a perfectly good stereo.) Since the finish on the wood was in beautiful shape, we did not have to worry about stripping or refinishing.
We built a shelf to go inside each of our soon-to-be-created cabinets. One on the right measured to fit the DVD player, old-school Nintendo, and the Wii; and one on the left to hold some of our DVDs.
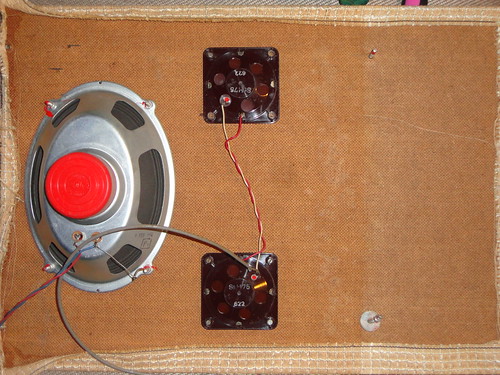
When we pulled off the speaker fronts we were left with this...
We removed all the speaker components and the old fabric coverings...being careful to first remove the applied stereo emblem so we could re-attach it later. It was amazing how many teeny tiny bolts, nuts, and washers were holding this thing on!
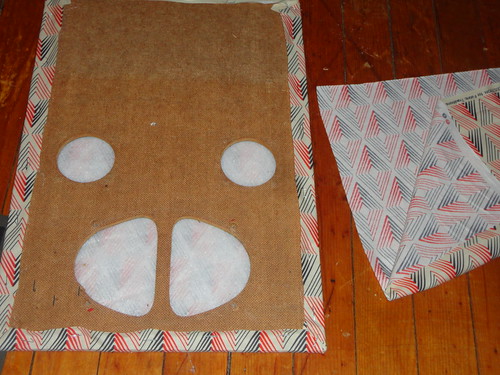
Next we covered the speakers with a thin layer of batting to camouflage the holes left by the speakers, and then covered the entire front with some fun fabric purchased for just this occasion.
We decided to go with something modern, but with a vintage feel to compliment the mid-century design. After wrapping the front tightly and stapling it around back, we cut a piece to cover up the backside so when the door is open you can't see the rough edges. We didn't want the staples showing, so after turning under the edges it was hot glued in place.
Once the doors were finished, we added gold nobs, replaced the stereo emblem and hinged the doors onto the front of the cabinet. This is where our major "oops!" moment came in...we had cut down the top of the speakers so they would sit on the outside of the cabinet (they had originally been mounted on the inside) but had forgotten to cut down the sides to allow for the hinges. However, with some quick thinking from Jess, the doors were mounted and it was ready for the television.
And here is the finished product...plus a sneak peak of the wall color in the living room.
We were pretty pleased with how our first furniture DIY for the new apartment turned out.
Have you ever tried making over a piece of furniture? Did you find it harder than all those blogs make it look, or easier? Most importantly, did you follow that good ol' fatherly advice to measure twice and cut once?!?
We decided that something light and airy would be perfect, and settled on a mid-century credenza-style TV stand. After realizing that a credenza might be a bit long for the wall, we decided to keep an open mind, but stick to that sort of look. Of course, we did not want to just go out and buy something, because we pride ourselves on a nice mix of aesthetics in our apartment: antique, contemporary, refurbished, bold, neutral, etc. So, after carefully measuring our space, we went on the hunt. I think we each trolled Craigslist about five times a day, plus stopped in every antique store and resale shop we came across over the last month. Finally we found something! Below is a brief history of how we made our new TV stand...
After relentless searching, we finally found this gem on Craigslist last week for.....$50!!!! I'd say that's a pretty perfect price!
Now, don't get confused. After we picked it up and got it home I thought "hmmm...I'll put in dinner and then we can start working on this while it cooks." Silly Me! I forgot how we work in our household...something comes in and it INSTANTLY gets started! By the time I put dinner in the oven, Jess had already taken one of the speaker fronts off...so this is only a sort-of before picture.
As you may have realized with the mention of speaker fronts, this is not a credenza but a mid-century stereo cabinet. The previous owner had already removed all the internal workings for the stereo, but that just made our job less difficult and much less guilt ridden! (For the longest time we were finding "working" stereo cabinets online but just couldn't muster the resolve to rip out a perfectly good stereo.) Since the finish on the wood was in beautiful shape, we did not have to worry about stripping or refinishing.
We built a shelf to go inside each of our soon-to-be-created cabinets. One on the right measured to fit the DVD player, old-school Nintendo, and the Wii; and one on the left to hold some of our DVDs.
When we pulled off the speaker fronts we were left with this...
We removed all the speaker components and the old fabric coverings...being careful to first remove the applied stereo emblem so we could re-attach it later. It was amazing how many teeny tiny bolts, nuts, and washers were holding this thing on!
Next we covered the speakers with a thin layer of batting to camouflage the holes left by the speakers, and then covered the entire front with some fun fabric purchased for just this occasion.
We decided to go with something modern, but with a vintage feel to compliment the mid-century design. After wrapping the front tightly and stapling it around back, we cut a piece to cover up the backside so when the door is open you can't see the rough edges. We didn't want the staples showing, so after turning under the edges it was hot glued in place.
Once the doors were finished, we added gold nobs, replaced the stereo emblem and hinged the doors onto the front of the cabinet. This is where our major "oops!" moment came in...we had cut down the top of the speakers so they would sit on the outside of the cabinet (they had originally been mounted on the inside) but had forgotten to cut down the sides to allow for the hinges. However, with some quick thinking from Jess, the doors were mounted and it was ready for the television.
And here is the finished product...plus a sneak peak of the wall color in the living room.
We were pretty pleased with how our first furniture DIY for the new apartment turned out.
Have you ever tried making over a piece of furniture? Did you find it harder than all those blogs make it look, or easier? Most importantly, did you follow that good ol' fatherly advice to measure twice and cut once?!?
Subscribe to:
Posts (Atom)