Showing posts with label fabric. Show all posts
Sunday, January 26, 2014
Make Do...in more ways than one!
Last year I followed along oogling over the projects various sewers were creating for The Historical Sew Fortnightly Challenge hosted by The Dreamstress. This year, I decided to join in on the fun. The reason is multifaceted a) it will encourage me to make some of the wonderful historical garments I incessantly pin on Pinterest, b) it will get me back into the swing of posting on this little blog of mine and sharing projects with my family, and c) it sounds like a fun creative challenge.
I've decided to aim for doing the "half marathon." In other words, instead of trying to do all 24 challenges, I'll aim to participate in 12 challenges. That way I will have a month to work on each challenge, rather than two weeks, which I just don't see fitting in well to my current busy schedule!
The first challenge this year is entitled Make Do & Mend. I ended up starting this challenge a little early, as I was looking to make myself a new dress to wear for Christmas and the parties that come with it. I went digging in my stash of vintage patterns and found one from Jessica's grandmother...one of those fabulous mail-order patterns! When I started working on the dress I thought it would be perfect for this challenge as it would fit the theme in a couple of different ways. First of all, the dress looked to be from the 1940s and therefore might have been made by someone in the midst of the Make Do & Mend movement during WWII. And secondly, it was made entirely of fabric I found in my stash. Originally I wanted the main body of the dress to be the print, with the accents in solid red...but lo and behold I didn't have enough print to do that so I had to change it up to make do with the fabric I already had.
Now...here is where I failed on this challenge. Most of my interest in historical fashion is in the extended 19th century...ask me when a garment was made during that period and I can narrow it down to 5 years or less. Post-1925, however, I'm still working on really getting to know all the little nuances as fashions began changing more rapidly and the ready-to-wear industry boomed with fashion trends, in general, starting to move more quickly. So, I went online to look up this pattern to see if I could find an exact date...I was guessing it was somewhere around the mid-1940s, so right about the cutoff date of 1945. Good news...I found an advertisement for this dress in a newspaper online! Check it out here. Now, if you went to the link you have probably already guessed the bad news. That's right, according to the newspaper advertisement the dress is from 1950. Whomp whomp. :-(
I've decided to go a head and post it, as I fully believed when I was making it that it would be perfect for this challenge. I guess I'll just have to date before I make when tackling something 1940s for any future challenges!!
The Challenge: Make Do & Mend
Fabric: 100% cotton, both print and solid
Pattern: Sue Burnett 8419
Year: 1950
Notions: snaps and hooks for the side placket closing
How historically accurate is it? Pretty accurate
Hours to complete: Hmm...forgot to track this...probably around 6-8?
First worn: Work holiday party
Total cost: Nothing right then...everything was from my stash
Monday, July 16, 2012
The Story of a Tank Dress
My sister Emily posted a link on my Facebook to a blog she thought I would like...well, as usual, she was right. Not only did I immediately fall in love with, and make, the tutorial she linked to, but I spent a good portion of tonight reading all the way to the beginning! What was this wonderful blog and tutorial my sister sent me, you may ask? Sweet Verbena, right here on Blogger. Katy has some great tutorials, plus an adorable puppy that I sort of covet...he looks like Josephine, only a dog :-)
The tutorial Emily sent me was for Katy's tank-top turned dress, you can find it here. Now, I forewarn, this is not a tutorial, it is simply a few pictures showing you how it went when I followed Katy's tutorial. If you want the real thing, click on over to Sweet Verbena.
Here is the fabric, and the tank top I used. They made for a nice combination.
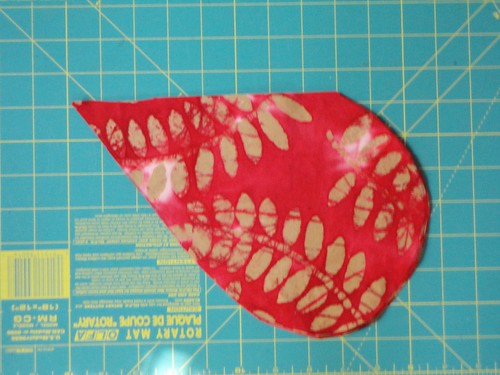
I followed along carefully and cut my tank top, sewed the elastic to the bottom, cut the fabric, and cut out the pockets...see...
It's a little blurry, but you get the idea. I was surprised at how easy doing the pockets were. I don't know why I always assumed pockets would be difficult, they aren't...at all.
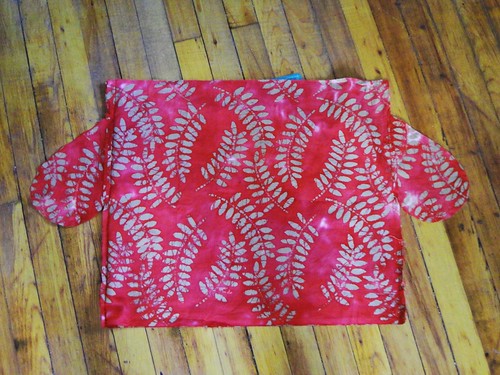
Next, it was time to sew the skirt portion together. It looked a little funny lying on the floor...
But it turned out just how it was supposed to! Next I gathered it at the top and stitched it to the tank top. I had Jessica try it on before I ironed it, it was sort of funny because the freshly gathered skirt before ironing made it REALLY poofy at the seam and it gave Jessica a very odd shape. Luckily, after some ironing it looked pretty good. Here's Jessica's finished tank dress.
I think I just may have to make one for myself! As with all tutorials, I learned something about my own materials and how you sometimes have to adjust what you are doing based on slight differences. For instance, since ribbed tank tops have much more built in stretch, I should have made the elastic piece around the bottom a little larger to make it even easier to get on and off. Oh well, at least it still fit!
Have you discovered a new blog lately? Saw something you just had to create right then? Or just shared some inspiration with family?
The tutorial Emily sent me was for Katy's tank-top turned dress, you can find it here. Now, I forewarn, this is not a tutorial, it is simply a few pictures showing you how it went when I followed Katy's tutorial. If you want the real thing, click on over to Sweet Verbena.
Here is the fabric, and the tank top I used. They made for a nice combination.
I followed along carefully and cut my tank top, sewed the elastic to the bottom, cut the fabric, and cut out the pockets...see...
It's a little blurry, but you get the idea. I was surprised at how easy doing the pockets were. I don't know why I always assumed pockets would be difficult, they aren't...at all.
Next, it was time to sew the skirt portion together. It looked a little funny lying on the floor...
But it turned out just how it was supposed to! Next I gathered it at the top and stitched it to the tank top. I had Jessica try it on before I ironed it, it was sort of funny because the freshly gathered skirt before ironing made it REALLY poofy at the seam and it gave Jessica a very odd shape. Luckily, after some ironing it looked pretty good. Here's Jessica's finished tank dress.
I think I just may have to make one for myself! As with all tutorials, I learned something about my own materials and how you sometimes have to adjust what you are doing based on slight differences. For instance, since ribbed tank tops have much more built in stretch, I should have made the elastic piece around the bottom a little larger to make it even easier to get on and off. Oh well, at least it still fit!
Have you discovered a new blog lately? Saw something you just had to create right then? Or just shared some inspiration with family?
Tuesday, April 17, 2012
Before and After: Stereo Cabinet
Moving into our new apartment has been stressful, exciting, and a challenge. One of the first challenges we faced was what to do with the television. Our new living room is about the size and shape of our old living room (narrow and rectangular) but our old set-up just was not going to work. At our previous apartment, the TV sat on a short bookcase with a large bookcase on either side, which was great since that was the only available place to keep all our books. However, now that our books are kept in an entirely separate room, we could do something a little less imposing for the TV.
We decided that something light and airy would be perfect, and settled on a mid-century credenza-style TV stand. After realizing that a credenza might be a bit long for the wall, we decided to keep an open mind, but stick to that sort of look. Of course, we did not want to just go out and buy something, because we pride ourselves on a nice mix of aesthetics in our apartment: antique, contemporary, refurbished, bold, neutral, etc. So, after carefully measuring our space, we went on the hunt. I think we each trolled Craigslist about five times a day, plus stopped in every antique store and resale shop we came across over the last month. Finally we found something! Below is a brief history of how we made our new TV stand...
After relentless searching, we finally found this gem on Craigslist last week for.....$50!!!! I'd say that's a pretty perfect price!
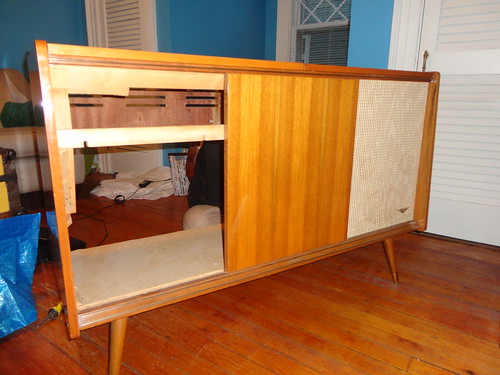
Now, don't get confused. After we picked it up and got it home I thought "hmmm...I'll put in dinner and then we can start working on this while it cooks." Silly Me! I forgot how we work in our household...something comes in and it INSTANTLY gets started! By the time I put dinner in the oven, Jess had already taken one of the speaker fronts off...so this is only a sort-of before picture.
As you may have realized with the mention of speaker fronts, this is not a credenza but a mid-century stereo cabinet. The previous owner had already removed all the internal workings for the stereo, but that just made our job less difficult and much less guilt ridden! (For the longest time we were finding "working" stereo cabinets online but just couldn't muster the resolve to rip out a perfectly good stereo.) Since the finish on the wood was in beautiful shape, we did not have to worry about stripping or refinishing.
We built a shelf to go inside each of our soon-to-be-created cabinets. One on the right measured to fit the DVD player, old-school Nintendo, and the Wii; and one on the left to hold some of our DVDs.
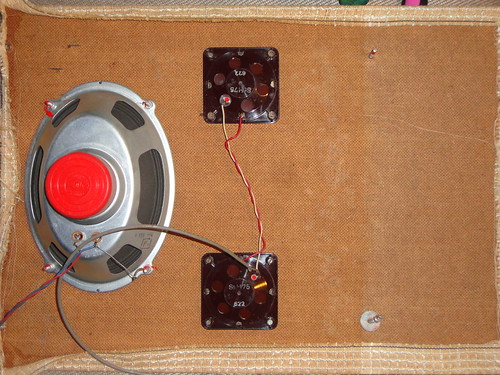
When we pulled off the speaker fronts we were left with this...
We removed all the speaker components and the old fabric coverings...being careful to first remove the applied stereo emblem so we could re-attach it later. It was amazing how many teeny tiny bolts, nuts, and washers were holding this thing on!
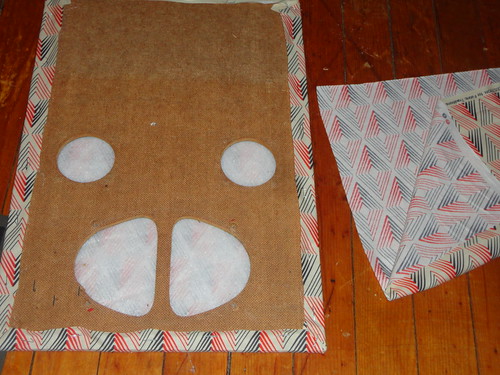
Next we covered the speakers with a thin layer of batting to camouflage the holes left by the speakers, and then covered the entire front with some fun fabric purchased for just this occasion.
We decided to go with something modern, but with a vintage feel to compliment the mid-century design. After wrapping the front tightly and stapling it around back, we cut a piece to cover up the backside so when the door is open you can't see the rough edges. We didn't want the staples showing, so after turning under the edges it was hot glued in place.
Once the doors were finished, we added gold nobs, replaced the stereo emblem and hinged the doors onto the front of the cabinet. This is where our major "oops!" moment came in...we had cut down the top of the speakers so they would sit on the outside of the cabinet (they had originally been mounted on the inside) but had forgotten to cut down the sides to allow for the hinges. However, with some quick thinking from Jess, the doors were mounted and it was ready for the television.
And here is the finished product...plus a sneak peak of the wall color in the living room.
We were pretty pleased with how our first furniture DIY for the new apartment turned out.
Have you ever tried making over a piece of furniture? Did you find it harder than all those blogs make it look, or easier? Most importantly, did you follow that good ol' fatherly advice to measure twice and cut once?!?
We decided that something light and airy would be perfect, and settled on a mid-century credenza-style TV stand. After realizing that a credenza might be a bit long for the wall, we decided to keep an open mind, but stick to that sort of look. Of course, we did not want to just go out and buy something, because we pride ourselves on a nice mix of aesthetics in our apartment: antique, contemporary, refurbished, bold, neutral, etc. So, after carefully measuring our space, we went on the hunt. I think we each trolled Craigslist about five times a day, plus stopped in every antique store and resale shop we came across over the last month. Finally we found something! Below is a brief history of how we made our new TV stand...
After relentless searching, we finally found this gem on Craigslist last week for.....$50!!!! I'd say that's a pretty perfect price!
Now, don't get confused. After we picked it up and got it home I thought "hmmm...I'll put in dinner and then we can start working on this while it cooks." Silly Me! I forgot how we work in our household...something comes in and it INSTANTLY gets started! By the time I put dinner in the oven, Jess had already taken one of the speaker fronts off...so this is only a sort-of before picture.
As you may have realized with the mention of speaker fronts, this is not a credenza but a mid-century stereo cabinet. The previous owner had already removed all the internal workings for the stereo, but that just made our job less difficult and much less guilt ridden! (For the longest time we were finding "working" stereo cabinets online but just couldn't muster the resolve to rip out a perfectly good stereo.) Since the finish on the wood was in beautiful shape, we did not have to worry about stripping or refinishing.
We built a shelf to go inside each of our soon-to-be-created cabinets. One on the right measured to fit the DVD player, old-school Nintendo, and the Wii; and one on the left to hold some of our DVDs.
When we pulled off the speaker fronts we were left with this...
We removed all the speaker components and the old fabric coverings...being careful to first remove the applied stereo emblem so we could re-attach it later. It was amazing how many teeny tiny bolts, nuts, and washers were holding this thing on!
Next we covered the speakers with a thin layer of batting to camouflage the holes left by the speakers, and then covered the entire front with some fun fabric purchased for just this occasion.
We decided to go with something modern, but with a vintage feel to compliment the mid-century design. After wrapping the front tightly and stapling it around back, we cut a piece to cover up the backside so when the door is open you can't see the rough edges. We didn't want the staples showing, so after turning under the edges it was hot glued in place.
Once the doors were finished, we added gold nobs, replaced the stereo emblem and hinged the doors onto the front of the cabinet. This is where our major "oops!" moment came in...we had cut down the top of the speakers so they would sit on the outside of the cabinet (they had originally been mounted on the inside) but had forgotten to cut down the sides to allow for the hinges. However, with some quick thinking from Jess, the doors were mounted and it was ready for the television.
And here is the finished product...plus a sneak peak of the wall color in the living room.
We were pretty pleased with how our first furniture DIY for the new apartment turned out.
Have you ever tried making over a piece of furniture? Did you find it harder than all those blogs make it look, or easier? Most importantly, did you follow that good ol' fatherly advice to measure twice and cut once?!?
Thursday, February 23, 2012
One 1810s dress...DONE!
I finally finished Kate's dress and spencer jacket this weekend. I was in need of a little added inspiration, so I put on Mansfield Park and set to work. All in all it turned out pretty well. The spencer gave me some headaches, but since I do not yet have a lot of practice in pattern adjustment I think it all worked out in the end. Here is the finished product
Kate is coming to pick it up on Sunday and I can't wait to see how the spencer fits. The last time she tried it on it was a muslin mock-up with one sleeve!
In other news, you might start seeing a little bit more decorating type DIY on Midwest Nutmeg. We are moving into a new apartment and it needs a little bit of design to make it home. So, expect a few DIY home projects, before and after photos, and who knows what else. It is a new and exciting adventure!
Have you finished any projects lately? Or planning any life changes?
Kate is coming to pick it up on Sunday and I can't wait to see how the spencer fits. The last time she tried it on it was a muslin mock-up with one sleeve!
In other news, you might start seeing a little bit more decorating type DIY on Midwest Nutmeg. We are moving into a new apartment and it needs a little bit of design to make it home. So, expect a few DIY home projects, before and after photos, and who knows what else. It is a new and exciting adventure!
Have you finished any projects lately? Or planning any life changes?
Wednesday, February 1, 2012
Mug Rugs
Remember all that fun fabric I bought just before Christmas for making presents? Well, now that the recipients have them, I can finally show you what I made.
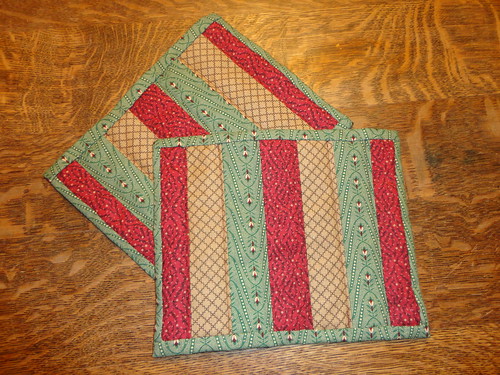
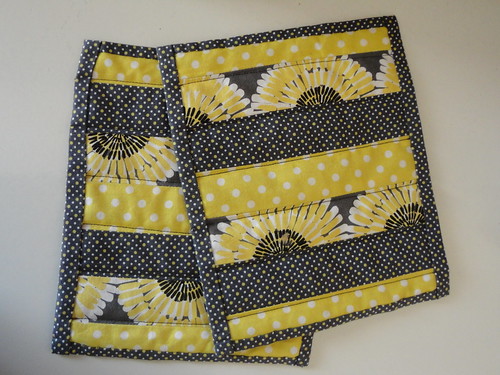
I made.....MUG RUGS! Each person's fabric coordinated with their tastes.
Some were traditional...
Some were more modern...
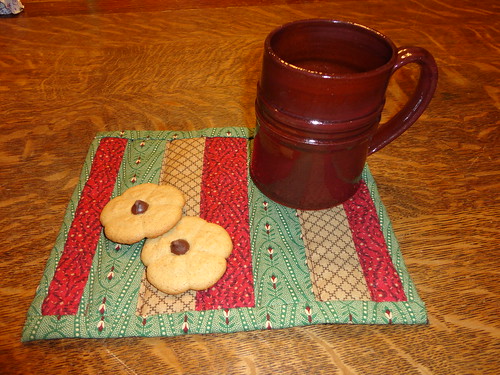
But all of them let you keep your mug of toasty warm beverage right there with your snack of choice...in this case, my sister's super yummy Black-eyed Susan cookies!
It took me a little while to get it right. I had never done machine sewing before, even in the smallest of projects, but I think they turned out all right.
Did you get any homemade Christmas presents this year?
I made.....MUG RUGS! Each person's fabric coordinated with their tastes.
Some were traditional...
Some were more modern...
But all of them let you keep your mug of toasty warm beverage right there with your snack of choice...in this case, my sister's super yummy Black-eyed Susan cookies!
It took me a little while to get it right. I had never done machine sewing before, even in the smallest of projects, but I think they turned out all right.
Did you get any homemade Christmas presents this year?
Monday, January 23, 2012
Kate's Dress
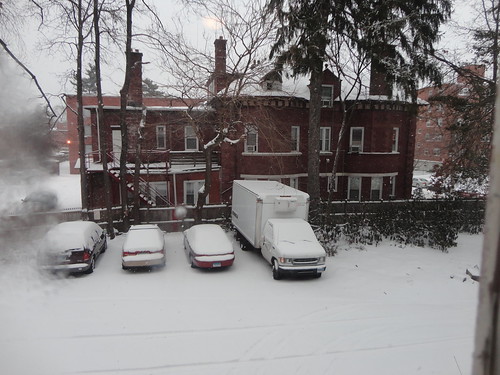
I'm making my friend Kate a dress, an 1810s dress. We found this beautiful fabric and since I didn't have work on Saturday because it looked like this outside...
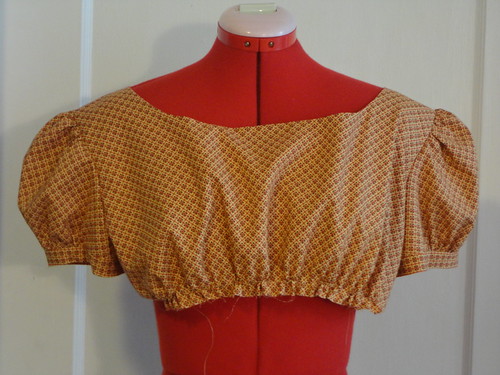
I spent the day working on it. It is so nice getting a large chunk of time to devote to a single project, you can always make such progress. I did a bit of Frankenstein work on the pattern, since Kate liked the top of one pattern but wanted it with the short, puffed sleeves or the other pattern. So, this is the resulting bodice.
And here is the entire dress. I think it turned out really nicely, and the color for the sash is perfect.
There is also fabric to make a brown spencer jacket, which uses the long sleeves that are supposed to be on this dress combined with an adjusted pattern for the other dress bodice with a lot of tweeks. You'll be seeing that project later.
What do you like to work on when you find yourself with extra time?
I spent the day working on it. It is so nice getting a large chunk of time to devote to a single project, you can always make such progress. I did a bit of Frankenstein work on the pattern, since Kate liked the top of one pattern but wanted it with the short, puffed sleeves or the other pattern. So, this is the resulting bodice.
And here is the entire dress. I think it turned out really nicely, and the color for the sash is perfect.
There is also fabric to make a brown spencer jacket, which uses the long sleeves that are supposed to be on this dress combined with an adjusted pattern for the other dress bodice with a lot of tweeks. You'll be seeing that project later.
What do you like to work on when you find yourself with extra time?
Monday, October 24, 2011
Fritters and Fabric
Today was a Suzie Homemaker kind of day. It started out with delicious homemade apple fritters. YUM!
Usually frying things in oil makes the house smell awful, but this time it smelled sweet, like apples and cinnamon.
And the delicious end product wasn't nearly as hard to make as it looked.
Then it was on to raking the leaves, doing the laundry, and ironing. The best part about it was that I could finally pre-wash some fabrics I bought with friends at the local quilt shop.
They are mostly for Christmas presents, so it will be a while before you see what I'm turning them in to (can't go spoiling the surprise!).
Have you ever tried homemade apple fritters?
Usually frying things in oil makes the house smell awful, but this time it smelled sweet, like apples and cinnamon.
And the delicious end product wasn't nearly as hard to make as it looked.
Then it was on to raking the leaves, doing the laundry, and ironing. The best part about it was that I could finally pre-wash some fabrics I bought with friends at the local quilt shop.
They are mostly for Christmas presents, so it will be a while before you see what I'm turning them in to (can't go spoiling the surprise!).
Have you ever tried homemade apple fritters?
Tuesday, September 27, 2011
1940s Dress...the end
Well folks...here it is! The 1940s dress got done just in time for the Saturday Lobster Dinner. And by just in time, I really do mean it. I was doing hems, sewing buttons, and finishing zippers Friday night. But, it all worked out and I think it turned out rather well.
The one part I ended up having a little trouble with was the one part I had not practiced on the muslin. The buttons at the collar go through bounded button holes. Now, bounded button holes are actually fairly simple to make, the difficulty came when I made them on the wrong side. So, I had to do a bit of hand work to make it all work out because it was a little late when I realized what I had done and it was no longer a simple fix with a seam ripper.
To make sure that the dress looked a little more modern vintage and a little less costume, we decided to nix the self-fabric belt for the time being. It got jazzed up with a skinny black belt and some black sandals. It looked pretty good!
Did you finish any good projects over the weekend?
The one part I ended up having a little trouble with was the one part I had not practiced on the muslin. The buttons at the collar go through bounded button holes. Now, bounded button holes are actually fairly simple to make, the difficulty came when I made them on the wrong side. So, I had to do a bit of hand work to make it all work out because it was a little late when I realized what I had done and it was no longer a simple fix with a seam ripper.
To make sure that the dress looked a little more modern vintage and a little less costume, we decided to nix the self-fabric belt for the time being. It got jazzed up with a skinny black belt and some black sandals. It looked pretty good!
Did you finish any good projects over the weekend?
Tuesday, September 20, 2011
1940s dress...the beginning
Back in June I posted about some awesome vintage patterns I purchased, along with some wonderful red, white, and blue fabric from Moda. Well, I finally started on the dress! First thing was first, though...I had never sewn with a vintage pattern before, so I wanted to make sure I really knew what I was doing and everything would fit well before I cut into my fashion fabric.
I was both pleasantly surprised, and super intimidated, when I opened the pattern envelope. Surprised because, since you buy exactly the size you need, there is no pattern cutting...YAY! That has always been one of my least favorite parts, because I inevitably tear the delicate paper of the pattern pieces. The part that intimidated me was the single sheet of instructions...not only that, but it was only one side of the sheet! They were relying on the fact that most women knew something about sewing clothing in the 1940s.
I decided that since I was just doing a dry run of the pattern, I would not waste fabric doing more than necessary. I only cut out one sleeve and only cut the skirt pieces down about 12 inches from the waist, enough to do the waistline, while just checking the length with the paper pieces.
This is what I ended up with...and am I ever glad I decided to do it! No part of the pattern was difficult, but some parts were a little confusing the way they were worded in the directions (or lack-there-of). Now I feel much more confident to cut it out of the fashion fabric.
You will get to see the finished product soon. Currently it is still in pieces on my ironing board, but since it must be finished for the Annual Lobster Dinner at the Litchfield Museum on Saturday, I better get to sewing!
Have you finally tackled a project you've put off all summer?
I was both pleasantly surprised, and super intimidated, when I opened the pattern envelope. Surprised because, since you buy exactly the size you need, there is no pattern cutting...YAY! That has always been one of my least favorite parts, because I inevitably tear the delicate paper of the pattern pieces. The part that intimidated me was the single sheet of instructions...not only that, but it was only one side of the sheet! They were relying on the fact that most women knew something about sewing clothing in the 1940s.
I decided that since I was just doing a dry run of the pattern, I would not waste fabric doing more than necessary. I only cut out one sleeve and only cut the skirt pieces down about 12 inches from the waist, enough to do the waistline, while just checking the length with the paper pieces.
This is what I ended up with...and am I ever glad I decided to do it! No part of the pattern was difficult, but some parts were a little confusing the way they were worded in the directions (or lack-there-of). Now I feel much more confident to cut it out of the fashion fabric.
You will get to see the finished product soon. Currently it is still in pieces on my ironing board, but since it must be finished for the Annual Lobster Dinner at the Litchfield Museum on Saturday, I better get to sewing!
Have you finally tackled a project you've put off all summer?
Tuesday, July 26, 2011
More Sandwich Sets...
A friend of mine moved to Ohio the other week, so I was in a tizzy trying to finish three lunch sets she had ordered for family for Christmas. It was fun to pick out fabric to match the different personality of each individual receiving one. Everything from girly-girl pink, to toned down autumnal orange. I think they turned out pretty well....
This time, instead of wrapping them up in brown paper, I wrapped them in their napkins. Since my friend who ordered them had not seen the fabrics yet, I thought it would be silly to wrap them when she would have to unwrap and re-wrap them all over again! I think I liked this better...
I attached some of my new business cards to the front along with a care instruction card. I hope they like them!
What do you prefer....the self-wrapping in the napkin, or the brown craft paper?
Wednesday, July 13, 2011
Summer Skirt
Lots of people enjoy shorts and tank tops in summer, me....I'm a skirt girl. I think that breezy skirts are THE way to go when the temperature warms up. I decided to make a new summer skirt, not for me, but for a friend...but I think a similar one for me is in the future.
The request was for a simple skirt with a shirred top, that was comfortable and breezy, but not super full. So, I stuck to a straight skirt style with just three rows of shirring at the waist. I've never tried shirring, so I decided it would be best to try it out first with a piece of muslin. This also allowed me to figure out how much the fabric would shrink with three rows of shirring and calculate the amount of fabric I would need to start.
Then, it was time to tackle the fashion fabric....Yikes! Always a scary task when you are trying something brand new. I love the orange of the skirt, it really popped. And here's the finished product...
I think it turned out pretty well for my first time. Next time maybe I'll do some more shirring at the top and see how it changes things. But I think this was a success!
Have you ever made anything with shirring? How did it work out?
The request was for a simple skirt with a shirred top, that was comfortable and breezy, but not super full. So, I stuck to a straight skirt style with just three rows of shirring at the waist. I've never tried shirring, so I decided it would be best to try it out first with a piece of muslin. This also allowed me to figure out how much the fabric would shrink with three rows of shirring and calculate the amount of fabric I would need to start.
Then, it was time to tackle the fashion fabric....Yikes! Always a scary task when you are trying something brand new. I love the orange of the skirt, it really popped. And here's the finished product...
I think it turned out pretty well for my first time. Next time maybe I'll do some more shirring at the top and see how it changes things. But I think this was a success!
Have you ever made anything with shirring? How did it work out?
Wednesday, June 22, 2011
A Fancy Bachelorette
Next month a friend of mine is getting married. My sister is the Maid of Honor and asked me to create a fancy and fun sash and blusher for the bride-to-be. So....I did!
There was one stipulation, the bride-to-be is going to wear a pink dress to her bachelorette party, and it needed to match. Instead of doing the traditional wording on the sash, I had a bit more fun with it and decided to go with something that still says, "this is my party" without screaming "I'm a bachelorette." Here is what resulted:
Here's a close up of the blusher...beads, fabric remnants, feathers, and sparkles...doesn't get much better!
And just to make sure that it fit the bride-to-be perfectly, I made a little pin so she can pin the sash together, and even pin it straight to her dress if necessary throughout the night of fun!
I hope she enjoys them and has a great time in the next few weeks as the best part approaches!!!!
Love you D.!!!!
What kinds of random crafty projects have you been asked to create?
There was one stipulation, the bride-to-be is going to wear a pink dress to her bachelorette party, and it needed to match. Instead of doing the traditional wording on the sash, I had a bit more fun with it and decided to go with something that still says, "this is my party" without screaming "I'm a bachelorette." Here is what resulted:
Here's a close up of the blusher...beads, fabric remnants, feathers, and sparkles...doesn't get much better!
And just to make sure that it fit the bride-to-be perfectly, I made a little pin so she can pin the sash together, and even pin it straight to her dress if necessary throughout the night of fun!
I hope she enjoys them and has a great time in the next few weeks as the best part approaches!!!!
Love you D.!!!!
Monday, June 13, 2011
A Great Week, Followed by a Great Project
The past week has been super amazing. I spent the majority of it at the Costume Society of America's National Symposium. It was up in Cambridge, Massachusetts, and the last day of the conference you could go on a post-symposium tour of your choice. I decided to head to the vintage market in Boston's South End. It was cold and dreary, but well worth it.
While at the vintage market, I found these fabulous 1940s dress patterns.
I plan to make the two on the ends at some point in the future. But the one in the middle...that one you will see sooner rather than later.
Make sure and check back to see what becomes of this amazing red fabric, and beautiful pattern.
Do you have any fun and exciting projects in the works right now?
While at the vintage market, I found these fabulous 1940s dress patterns.
I plan to make the two on the ends at some point in the future. But the one in the middle...that one you will see sooner rather than later.
Make sure and check back to see what becomes of this amazing red fabric, and beautiful pattern.
Do you have any fun and exciting projects in the works right now?
Tuesday, April 12, 2011
Lunch Sets for Friends
Today, first things first....I have to do a shout-out to my parents who are celebrating 31 fabulous years of marriage today! YAY! Thanks for the great example Mom and Dad!
All right, on to crafty goodness...
All that fabric I bought the other week, well, it finally turned itself into these adorable lunch sets. The sets include a sandwich wrap, snack bag, and napkin. I think they all turned out rather well...and I hope Kate and Julie were pleased!
I think the green fabric with the chairs is so adorable!
And the yellow is almost psychedelic!
Here's a look at all of them together...
And you can't forget the all important packaging...
It was so much fun to make something for friends and put in all the extra surprises (my favorite sandwich recipe tucked in each sandwich wrap, and a little care instructions card...always important).
What little extras do you like to include when making things for friends?
All right, on to crafty goodness...
All that fabric I bought the other week, well, it finally turned itself into these adorable lunch sets. The sets include a sandwich wrap, snack bag, and napkin. I think they all turned out rather well...and I hope Kate and Julie were pleased!
I think the green fabric with the chairs is so adorable!
And the yellow is almost psychedelic!
Here's a look at all of them together...
And you can't forget the all important packaging...
It was so much fun to make something for friends and put in all the extra surprises (my favorite sandwich recipe tucked in each sandwich wrap, and a little care instructions card...always important).
What little extras do you like to include when making things for friends?
Tuesday, March 22, 2011
Fabulous Fabric Shopping!
I love shoppng for fabric! Who doesn't?!?!? And as hard as it is to deny the great deals at large fabric stores, there is nothing like walking into an intimate quilt shop where everyone is more than happy to discuss your current project and help you with your selection. My selection was wide-ranging, from girly-girl pink printed birds, to stark white, red, and black printed spoons and forks. But I love them all.
I was buying fabric to make a lunch bag for myself and some reusable sandwich wraps and snack bags for some friends (which is why there is such a variety).
Another picture of my fabulous fabrics from Sew Inspired Quilt Shop in Simsbury, Connecticut.
Of course, when I got home, first things first...pre-wash and iron! I always like the way that my thread catcher looks after I cut all the loose threads as I iron.
SO COLORFUL!!!!!!
Where is your favorite place to go when you really want to have fun buying fabric?
I was buying fabric to make a lunch bag for myself and some reusable sandwich wraps and snack bags for some friends (which is why there is such a variety).
Another picture of my fabulous fabrics from Sew Inspired Quilt Shop in Simsbury, Connecticut.
Of course, when I got home, first things first...pre-wash and iron! I always like the way that my thread catcher looks after I cut all the loose threads as I iron.
SO COLORFUL!!!!!!
Where is your favorite place to go when you really want to have fun buying fabric?
Tuesday, February 22, 2011
Project Baby Cat Bed
A few months ago all this snow in Connecticut caused the roof to collapse on the carriage house next to our aparment building. Long story short, when this happened the bedroom window broke and shattered glass embedded itself in the cat bed under the window, thus began Project Baby Cat Bed.
I searched around for a cat bed pattern and found this one at Moda Bake Shop. They have some pretty adorable patterns on their website. I tweeked the pattern to be a bit smaller and becauseI wanted to do something different with the top.
Jessica picked out the browns and pinks and we added the green for a bit of pinache.
The baby cats are still a little unsure of it and didn't pay much attention until enticed with a bit of cat nip...but eventually Annie came over to check it out.
Only time will tell how much they really like it.
Have you ever made something special for your little furry (or non-furry) friend?
I searched around for a cat bed pattern and found this one at Moda Bake Shop. They have some pretty adorable patterns on their website. I tweeked the pattern to be a bit smaller and becauseI wanted to do something different with the top.
Jessica picked out the browns and pinks and we added the green for a bit of pinache.
The baby cats are still a little unsure of it and didn't pay much attention until enticed with a bit of cat nip...but eventually Annie came over to check it out.
Only time will tell how much they really like it.
Have you ever made something special for your little furry (or non-furry) friend?
Subscribe to:
Posts (Atom)